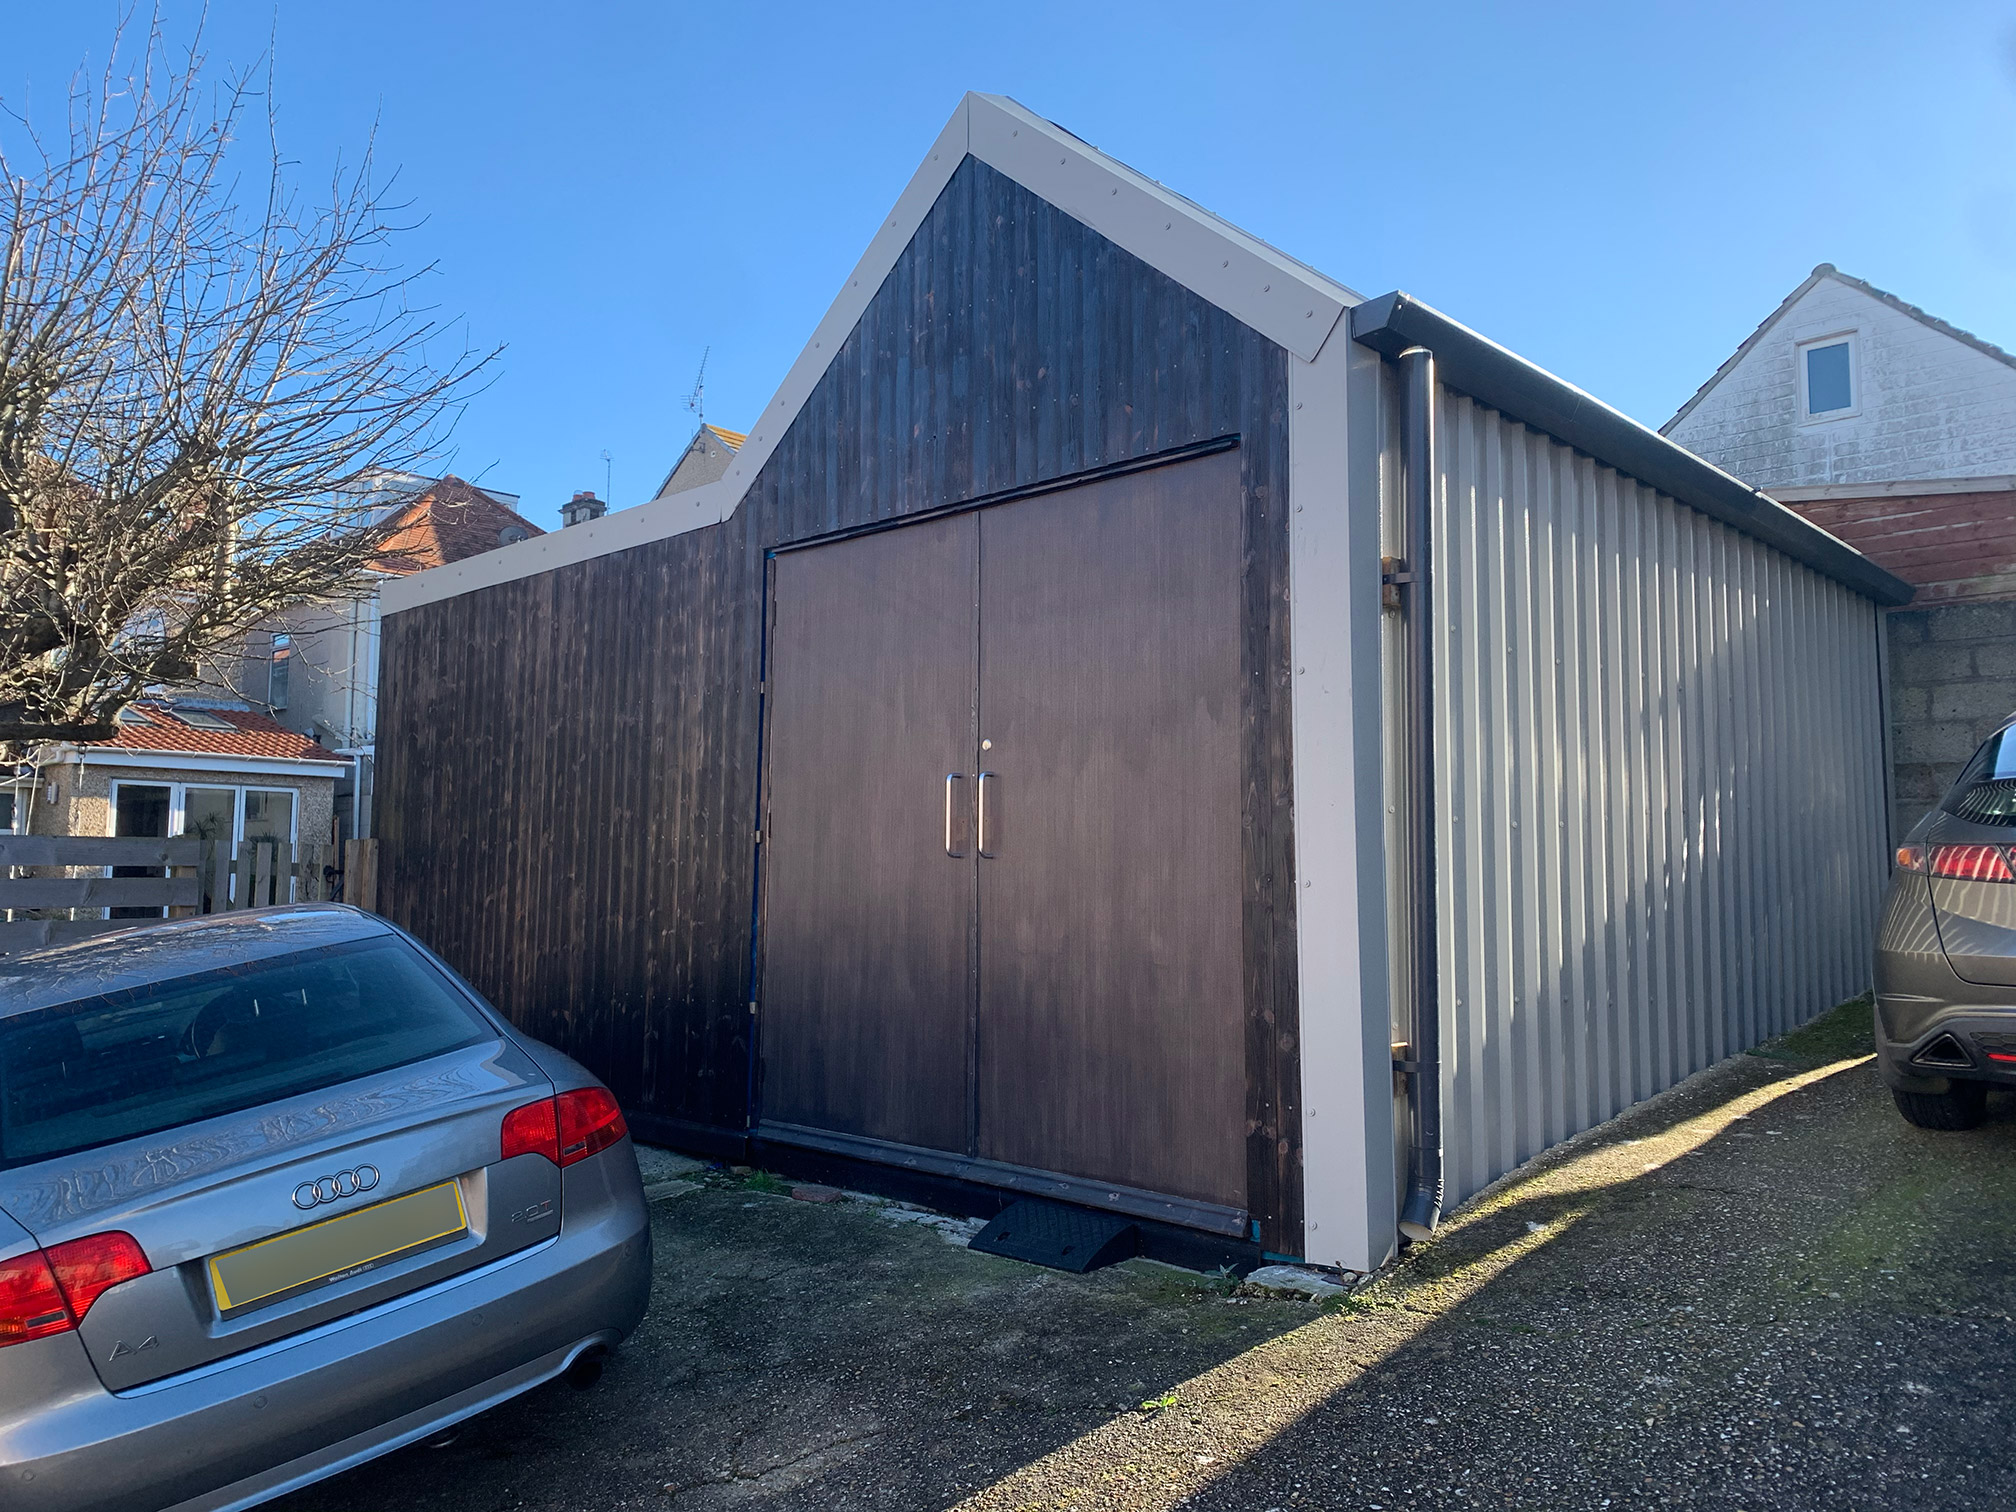
So this stage is basically about adding the nice stuff and decorating. There is still cladding to be added - which I'll get to, using the so called Japanese method, which I have my doubts about. I get to it further down in the post.

The building is completely sealed from the weather, roof is clad. Inside the services have been run around where needed including soil pipe, drainage, water supply, electric, phone, internet and other random things like a hole for AC and wiring for CCTV. The biggest bonus of this stage is that all of the life crap - that normally belongs in the garage can go back again. Thank god for that - its been a pain having it distributed all round the house. The office part is ready for further decoration and furniture etc.
So, the internet is provided by an ethernet cable along with all the other services buried in a trench in the ground. Its passed to a switch and another router. This works like a dream. The provider is promising 50Mb/s and true to their word after a bit of faffing it does actually start to get into that range. I made a decision early on that one of the things I really wanted was IOT lights, so I could remotely switch on the cabin from the house - primarily for late night, and so it has proved to be a total boon. Everything I own is Apple so this means Homekit - although there is a slight wrinkle here in that to have remote access ( for some things ) you have to have a base station - namely any new device ( laptop, ipad or phone ) or an apple home pod
Now - whilst the homepod might seem like a nice thing to have - which Im sure it is, the homekit suffers from a serious drawback, namely that a lot of developers are not interested in the Apple platform, or don't want to pay the dev costs involved in Homekit compatibility. Im sure Apple have made an amazing job of all of the little details, like security - but its slightly annoying for example I cant use Nest products, which are clearly pretty good. There is however a nice little work around for this - by using a Raspberry Pi and home bridge, but I will leave that for a later project and post.
So I get the Phillips Hue - which is Homekit compatible, but unfortunately it wont work with Siri remotely - disappointing. But not a deal breaker. So in the App you can connect remotely - it will switch on and off from the main house, but you have to use their app not Homekit and also you have to use an account to be logged in to pass the switch message remotely. However my original intention was to be able to be in the house - its dark, I want to arrive at the cabin seeing whats going on. And this is does really well. If Im actually in the cabin - I can use Siri to voice activate the lights which is handy in the morning.
In addition to this I also get a Netatmo fire alarm. The building is insured, but obviously being made of wood its a giant fire risk. No getting round that so its a fairly crucial bit of kit. This works with Homekit and isnt a problem - raises the alarm on phones, watches and other devices in the event of a fire.
I also decide that I want to be able to use CCTV to keep an eye on anything going on in and around the cabin. So I buy a Digital recorder with 2TB drive, two 4K cameras ( courtesy of Domar ) and get that plugged in. This is a continuous security measure that allows me to log in remotely ( nothing to do with Homekit ) and see exactly whats going on. Additionally they have motion sensing so that if somebody does decide to try and break in I get alerted right away. Its a pretty good system and comparatively the cost is minimal - £400 for the basic setup with 4K cameras - although these were hard wired via coax. If you want wifi enabled its quite a bit more. And guess what - because of the insulation the cabin is like a giant Faraday cage, so the internet signal is very weak outside in the garden - but you can leave the door open which works a bit if you need to do that. In reality if you wanted the internet in the garden you could install an outside router. But in all honesty I don't need to. My point here is that wifi cameras are not going to work without an extra external router. A bit disapointing if you bought them to discover this lateer on.
Because all of the cables are buried including the cameras and the CCTV is set to upload remotely via FTP, its pretty much impossible to avoid either detection or having an image relayed to a remote server. Nobody likes to say burglar proof but as close as can be. Even if you were to smash the windows, get in and steal the CCTV unit you still wouldn’t solve the problem. All for very cheap money considering how much they used to cost.
I know a lot of people would say not to post this kind of stuff - but I think in all honesty the amount of effort required to steal from this setup, and generally I mend everything and don’t buy new when it comes to tech so second hand isn’t even worth that much, the job of breaking in would not make sense. And thats the point - its cheap and very easy to protect yourself as opposed to hoping to remain unnoticed.
So with all that sorted the interior was the next focus. The garage part was left au naturel, as I wanted it for a workshop and actual garage for the motorbike. The office part we wanted to make a really good job of decorating. There was a few small jobs. I left the opening to the office from the garage quite large to build a custom set of sliding doors. This means that I can shift very large stuff about if and when I need to. The office had a hard floor added over the OSB board, click tile. And the rood also had a lining, using common or garden tongue in groove.
The cladding

Ok - so this part was fairly big I guess. I wanted that carbonised wood look. But What I didn’t want was to spend £3k buying larch. Given the stuff is there all for show - it doesn’t really provide any shelter as the lining does that adequately.
This method is called Shou Sugi ban - and its allegedly Japanese although I have seen lots of images of it being used in the States and Canada as well. Its just the Japanese have a name for it, which seems to have stuck. The important part is you are burning the wood which effectively cauterises the timber just like flash. Some make it black and some make it light. Either which way it makes the wood last a long time.
I found Jewsons made pine shiplap which was incredibly cheap. About a cm and a half thick, I think it worked out at about £300 for all the timber I needed. The whole cabin was then battened horizontally for vertical cladding. There is a problem with using thinner non hardwood timber - there are advantages as well. The biggest issue many would have is warping - but I have found that in all honesty none of the timbers have warped. In advantage you aren’t damaging the planet as much as pine is much more sustainable and obviously its much cheaper. I took an industrial burner head for a 25kg propane canister and did the lot. Once burnt its washed and thats it for the moment, its nailed up. I could have nailed invisibly but in all honesty galvanised nails are dark enough to not show. I went through about 3x25kg of propane, so factor in that cost.
Once the timber was all erected, it was coated with a very hard wood paint with a high UV protection, which cost about £30. One tin did everything. Following that the whole lot was capped with special bits of the roof cladding to finish it off.


